The Restoration Process
Initial Inspection
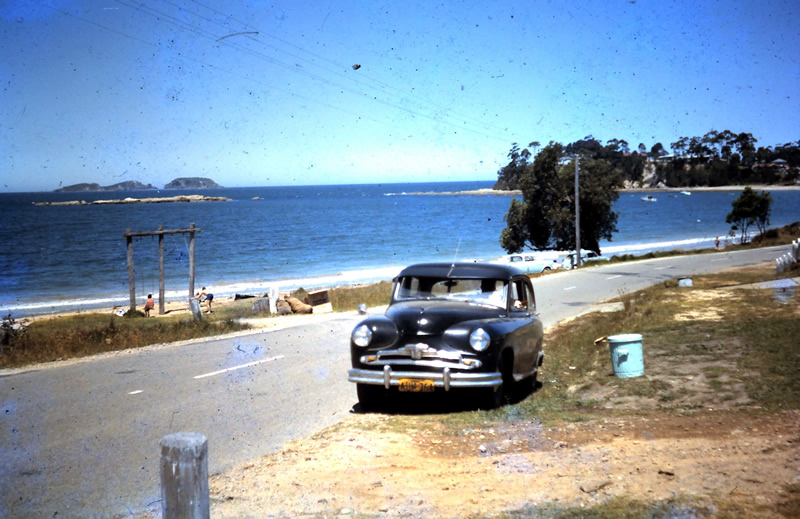
 As previously mentioned, the images of this vanguard displayed a black 1949 Vanguard in pristine, almost as new condition with an associated story of how this car had never been on a dirt road or been out in the rain. We later discovered that the images were from photos taken in 1984, 27 years earlier.
An initial inspection of the Vanguard was carried out by a group of us in early March 2011 on the return motorcycle ride from Phillip Island, after attending the Superbike Races. We travelled to Nutfield Victoria and found the address and the vanguard. It was located in a large shed, where I think it may have spent many lonely years.
We carried out an inspection, as best we could in the cramped conditions, and decided it was worth the effort of restoration. We settled on a price and arranged to pick up the vehicle early April 2011.
Some Vehicle Details
 Purchased From: Standard Cars Limited, Elizabeth Street Melbourne.
- Purchase Date: 29 July 1949.
- Purchased By: Mr C Parkins, 28 Walsal Ave., Reservoir Melbourne.
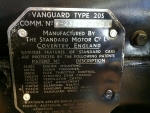
- Model: 1949 Standard Vanguard Saloon Type 20S.
- Colour: Black, Rust Leather.
- Tyres: 5 x Dun. 5.50 x 16.
- Engine No: V 23584 E.
- Chassis No: V 23934 DL.
- Body No: 434811.
- Commission No: V 23934 DL.
- Registration No: NO606.
- Purchase Price: £909 - 5 - 6 (Incl. sales tax, registration and weighing fees, supplying and fitting number plates, brackets etc. third party insurance.)
- Receipt No: 1875.
The Pickup
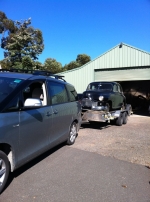 On 7 April 2011 a friend and I headed off from Nerriga NSW to Nutfield Victoria with car trailer in tow. We arrived to pick up the Vanguard the morning of 8 April 2011. The vanguard was pushed out of the shed and winched onto the trailer and by midday we were heading back to Nerriga NSW.
The return trip was interesting, looking in the rear view mirror and seeing this bloody big black monster tailgating us. We made it back ok, less quite a bit of rubber from the soft Tarago tyres.
The following day I travelled to my son's home at Albion Park NSW where we maneuvered the Vanguard into its new temporary home, the shed.
It's Interim Home - Albion Park NSW
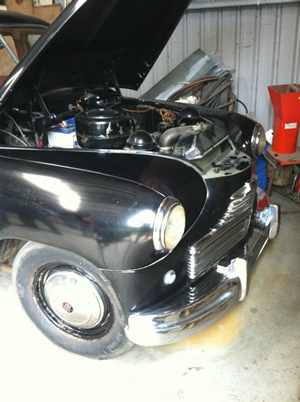
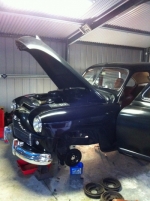 We immediately put her up on stands and started the stripping process, wheels, brakes, tail shaft, diff, rear springs, radiator, grill, head, steering box, steering rod assembly, starter motor, generator etc. etc. etc.
From the very start it was obvious that the story about the car never traveling on a dirt road, or not being taken out in the rain was not too accurate. The chassis was caked with dirt and dust from front to back; it had obviously spent many miles traveling dirt/mud roads. Also the engine was caked with grease, oil and dirt, there were several dints in the chassis where it looks like she hit some big boulders, also the RH engine mount bracket had been bent. There was only surface rust on the fuel tank, I was glad to see no other rust areas.
Where to Start? - Where to find parts?
After removing all the components where it was obvious there was a problem, such as oil leaks, perished rubber, damaged and pitted chrome etc. a priority list was made up. I joined the Illawarra Vintage Car Club as I knew I would need support from people of like minds and vehicles. This proved invaluable in more ways than one; I received great support and an enjoyable social environment.
A great deal of research was carried out using the internet, searching for some of the more difficult parts. I have listed all the sites where I found parts and/or a potential source of parts. I have also listed clubs were support can be found. These lists can be found on the Useful Links page.
I have also listed the parts replaced or repaired on the Parts Replaced or Repaired page.
Difficulties and Solutions
Several difficulties were encountered and so far a solution has been found for all of them.
Rear Brake Cylinders - Both front and rear brake cylinders were seized beyond repair, they had all been exposed to moisture via the old brake fluid. I had no problem sourcing the front wheel cylinders (new); however it became a real problem sourcing the rear brake cylinders. I finally found a new set via MEV SPARES in the UK; they stated that they were for the Series II not the Series I; however they looked exactly the same via their web page so I purchased them. They were the same and fitted perfectly.
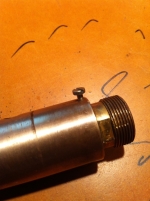 Speedo Driven Gear and Bearing Assembly - The oil seal needed replacement however after removal of the unit from the gearbox it was found to have been damaged as a result of a previous repair. A replacement unit was obtained and then the fun began. How to remove the seal? After close examination I found a small 1mm diameter pin was inserted through the screw end and the assembly body. The only way to remove it was to drill it out, which I did, the seal was then replaced and the screw end inserted. Rather than use a brass pin to secure the screw end, I drilled a larger hole and tapped it and inserted a small screw. This will make it much easier to replace the seal in the future.
Thermostat Housing - This Vanguard model used a combined thermostat housing and top radiator hose connection. The unit was so badly corroded it had to be replaced. After many days searching for a replacement I drew a blank, so I decided to use the parts for a Series II model. These parts include a thermostat housing and a top cover that connects to the radiator top hose. The original top hose went from the top of the thermostat housing across to the left hand side of the radiator top cover. With the new Series II parts, a new straight hose will need to connect to the centre of the radiator top cover. This will require blanking off the left hand hole and inserting a new pipe into the centre of the radiator top cover. This modification has now been completed with interesting results.
The new pipe mounted in the centre of the radiator top was pointed down at an excessive angle, so the Series II top radiator hose was not going to fit. Rather than have the radiator modified again I made a visit to the local car spare parts shop and looked through all the radiator hoses they had, eureka, I found one with an 'S' bend and it matched exactly.
With the top pipe and all other pipes fitted it was time to fit the temperature gauge transmitter bulb into the thermostat housing, bugger, didn't fit. The problem being a Series I transmitter bulb trying to mate with a Series II thermostat housing. Solution; get hold of a Series II bulb and attachment and get it attached to my transmitter tube. This has been sourced, now to get the bulb and attachment connected to the transmitter tube, time to find an expert in this field.
Steering Box - The steering box was a Bishops Cam type and was full of thick grease, right up the steering column to the felt bush next to the steering wheel. I know that the use of grease was a method of preventing/reducing leaking from the box. I decided that I would rather carry out a total repair of the box. The box was stripped and cleaned. Prior to its removal I had a bugger of a job removing the steering wheel from the inner shaft spline. My son, a motor mechanic, showed me how it's done, put your arms around the steering wheel and give it an almighty tug.
I purchased a new set of bearings cage and cups and proceeded to search for a replacement piman shaft bush, bottom seal, and upper column felt bush. There were also inner column rubber rings to find.
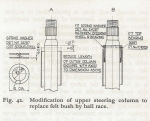 I found in the workshop manual that there was a modification where the upper column felt bush was replaced by a needle roller bearing. This bearing was found in the UK for me by Vanguard Triumph Wholesalers in Melbourne; it was not cheap but necessary. To fit this needle roller bearing it would be necessary to bore out part of the column and cut off a small part of the column end. After ringing a number of machine shops in the Wollongong area, without any luck, I was told about a retired fitter and turner craftsman in the area that may be able to assist.
 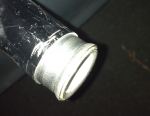 I contacted 'Jack' and made arrangements to take the steering box and needle roller to his workshop, under his house. After a few days the job was done and the needle roller bearing in place.
Another modification in the workshop manual was the addition of a second bush for the pitman shaft. I had no luck sourcing the correct bushes in Australia so I started my search in the UK and the US and found several sources. 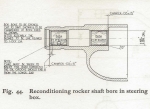 In fact if I was prepared to part with a small fortune I could have purchased a brand new steering box from the UK. I ordered 4 bushes so I would have a couple of spares if needed. I also obtained an end plate gasket from the same company. I decided that I needed Jack's help again. After contacting him and explaining what I needed he told me to bring the box and bushes over. Again after a few days the job was done, it was a magnificent job and took around 7 hours to do. The box had to be line bored allowing the accurate alignment of the bushes for the pitman shaft. Jack also had to make a special reamer as the bushes required reaming to fit the pitman shaft. Thanks jack...
To replace the rubber rings around the inner column required a trip to Clark Rubber. Armed with the measurements, I found some high density plastic tubing that would do the trick and as I only needed a couple of centimetres I got it for free, the cheapest part so far.
The original lower seal was made of cork, so I was not going to attempt to find one of those. I measured the ID and OD necessary and searched several Australian bearing/seal companies websites. I found what I thought was a match with a Brisbane company, Allied Bearings & Seals. I made contact and sure enough an exact match was found, I purchased two, keeping one for a spare. The box was re-assembled and re-installed in the Vanguard. I also found a source of special Penrite steering box oil.
Fuel Pump Return Spring - The return spring was found to be broken so a search was made for a replacement. It seems this is a very hard part to find. I did not want to have to purchase a complete pump so the search continued. As luck would have it I found a source via a Triumph parts supplier in South Australia, Norwood Parade Auto Spares. The owner found a return spring at his home and after a minimal payment sent it to me.
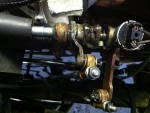 Gear Change Linkage Setup - I removed the gear change linkages for cleaning and then replaced them, this was prior to removing the steering box. At the time of removal the gear box had been removed from the vehicle and the gear box linkages were lying loose. When I replaced the linkage mechanism and the link rods, all looked fine. After replacing the gearbox and connecting up all the linkages something was wrong. The rear rod was too short, how could that be? My son and I spend about half a day trying to figure it out without success. The whole problem turned out to be a WRONG assumption.
A couple of days later I was examining several photos I had taken of the mechanism. Looking down on the mechanism, and the two rods extending to the gearbox I noticed that the two rods crossed, the front rod went to the rear of the box and the rear rod went to the front of the box.
So the WRONG assumption was, the front gearbox selector was 1st and Reverse and the rear gearbox selector was 2nd and 3rd, bugger, it's exactly the opposite. Next day I reversed the rods and all was fine, now I am an expert in this field.
Recent Water Pump Primary Seal Failure - Recently while departing on a vintage car rally the primary seal in the water pump failed. We managed to limp home and use our modern car for the trip. Attempting to obtain suitable spares and to affect repairs proved difficult.
I decided on a radical approach, I purchased a TR2 water pump from Rimmer Bros. in the UK and purchased a Series II pulley assembly from the Standard Motor Club UK. This pulley assembly matched the water pump housing except for the shaft length. I dismantled the TR2 pump and removed the shaft, I measured the shaft length required to mate the pulley assembly to the TR2 pump and got a new one turned up on a lathe including the cut out for the cotter pin.
The whole process was such a blinding success that I ordered a second TR2 pump from Rimmer Bros. and got another shaft turned up and built another water pump assembly for a spare.


